Fixing Epoxy Resin Bubbles in Deep Pour River Tables After Curing
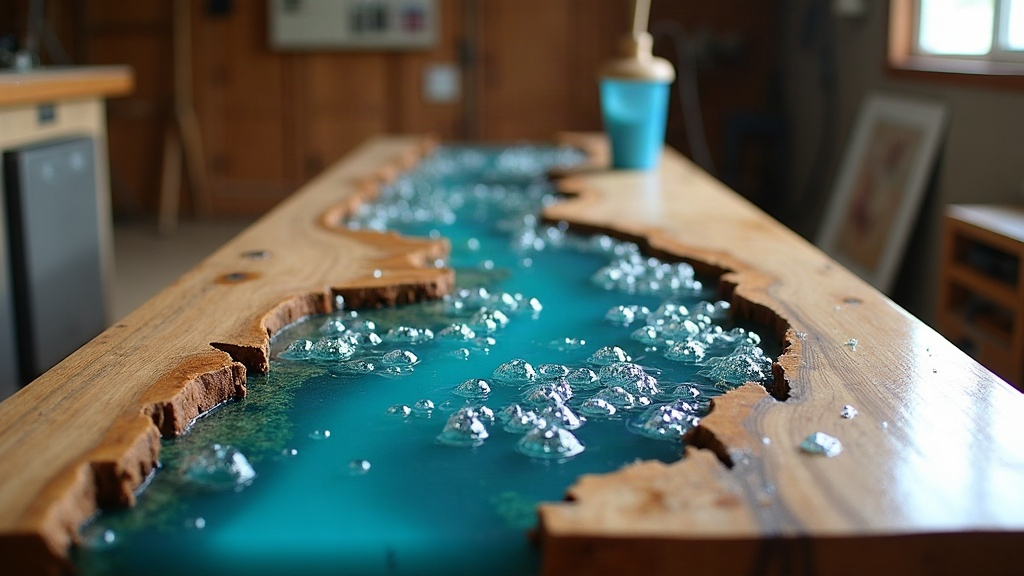
Why Your River Table Has Bubbles Even After It Cured (And How to Fix It)
Finding bubbles trapped in a deep pour river table after the epoxy has fully cured is annoying, no question. But here’s the good news: it’s fixable in almost every case. The repair depends entirely on where those bubbles are sitting. Surface bubbles? Sand them out and re-coat. Bubbles buried deep in the resin? That usually means drilling, injecting fresh epoxy, and refinishing the area. Below is the exact process for diagnosing the problem and repairing it without wrecking a piece you’ve already put hours into.
Why Bubbles Appear After Curing in Deep Pours
Deep pour epoxy bubbles constantly, and it’s largely because of two things: the sheer thickness of the pour and the exothermic reaction happening as it cures. A few usual suspects:
- Wood off-gassing — raw or unsealed wood releases trapped air as the resin heats up during curing. Think of the wood grain as a sponge full of tiny air pockets waiting to escape.
- Improper mixing — stir too fast or too aggressively and you’ll whip air straight into the resin, like beating egg whites without meaning to.
- Pouring too fast — a rapid pour traps air pockets, especially around bark edges, knots, or any uneven surface.
- Skipping a seal coat — skip that thin first layer and wood pores keep leaking air into your deep pour for hours.
- Temperature swings — a chilly garage or a room that fluctuates by even 10 degrees can cause micro-bubbles as the resin cures unevenly.
Knowing the actual cause matters. Fix the bubbles today without addressing the root issue, and you’ll likely see them again on your next pour.
Step 1: Identify Where the Bubbles Are
Before you touch a sander or a drill, figure out exactly what you’re dealing with:
- Surface-level — visible just under the glossy top coat, usually small, often clustered near where wood meets resin.
- Subsurface (mid-layer) — trapped between pour layers, showing up as cloudy or silvery patches when viewed at an angle.
- Deep/structural — larger voids near the bottom of the pour, sometimes detectable as a soft spot when you tap the surface with a knuckle.
Grab a flashlight, kill the lights, and shine it across the surface at a low angle. Bubbles that are invisible under your normal shop lighting suddenly jump out at you this way.
Fixing Surface Bubbles
If the bubbles sit only in the top few millimeters, you’re in luck. This is the easy fix:
- Sand the area with 120-grit sandpaper until the bubble opens up completely and the spot is flat.
- Move up through 220, 320, then 400 grit to smooth everything out.
- Wipe the area down with isopropyl alcohol to clear dust and residue.
- Mix a small batch of tabletop epoxy (not deep pour formula) and flood-coat the entire surface, not just the repaired spot. Skip that step and you’ll end up with visible lap lines you can’t unsee.
- Hit the fresh coat lightly with a torch or heat gun to pop any new micro-bubbles, then cover it and let it cure for 24 to 72 hours, dust-free.
Fixing Subsurface and Deep Bubbles
More work involved here, sure, but still totally manageable for a DIY builder:
- Locate and mark every void with a flashlight and a grease pencil so you don’t lose track of them.
- Drill down into each one using a small bit, 1/8” to 1/4”, held at a slight angle. Stop the moment you feel the drill break into the air pocket. Go slow. Drilling straight through the bottom of your table is a mistake you only make once.
- Clear the dust from each hole using a straw attachment on your vacuum or a blast of compressed air.
- Inject fresh deep pour epoxy into the hole with a syringe or a squeeze bottle fitted with a fine tip. Fill it slightly above the surface, since epoxy shrinks a bit as it hardens.
- Give it a few hours to gel, then sand it flush once it’s fully hardened.
- Finish with a full flood or top coat, same process as above, to blend the repair so it disappears into the surface.
Got a large void near the base of the table? Some builders flip the whole piece over (assuming the bottom’s unfinished) and inject from underneath. That way the finished top surface never gets touched.
Preventing Bubbles on Future Pours
- Always lay down a thin seal coat over raw wood and let it cure completely before your deep pour.
- Pour in stages of 1 to 2 inches rather than dumping the whole thing at once.
- Run a heat gun or propane torch over the surface right after each pour to release bubbles. Sweep across lightly, don’t hover in one spot or you’ll scorch the resin.
- Keep the workspace steady at 70-75°F (21-24°C) and away from drafts.
- Mix resin and hardener slowly, for a full 3 to 4 minutes, scraping the sides and bottom of the mixing container the whole time.
- For small or medium projects, a pressure pot or vacuum chamber is worth the investment. It’s genuinely the most reliable way to kill bubbles before they even have a chance to set.
When to Consider a Full Re-Pour
Sometimes spot repairs just aren’t enough. If bubbles run through multiple layers, or you discover structural voids compromising the table’s strength (say, a large air pocket cutting through a support area), sanding back heavily or starting the pour over might genuinely save you time. One or two isolated bubbles? Spot repair works great. Bubbles showing up over and over in large clusters usually mean something’s off in your mixing or pouring technique, and that needs fixing before you attempt another pour.
Conclusion
Bubbles in a cured deep pour river table aren’t a fatal flaw, they’re a finishing problem you can solve. Surface bubbles just need sanding and a fresh flood coat. Deeper voids call for drilling, injecting, and refinishing. And honestly, the real payoff comes from figuring out why the bubbles formed in the first place, so you can dial in your seal coats, pour thickness, and mixing habits and get a crystal-clear result on the very next build.