Hiding Hairline Cracks in Ebony with CA Glue and Sanding Dust
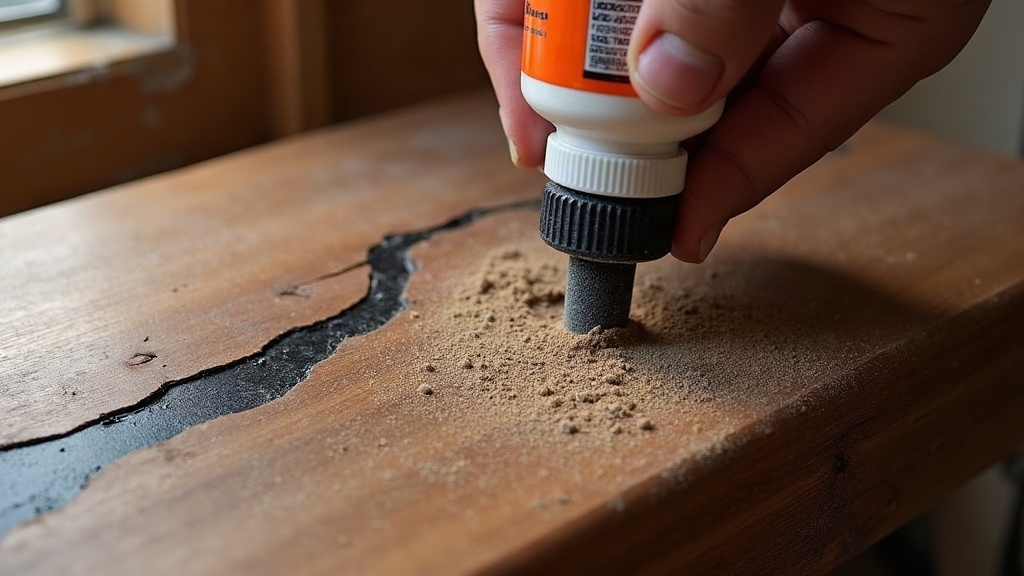
Hairline cracks in ebony show up a lot, and for good reason. The wood is unusually dense, it dries at a crawl, and it reacts hard to any swing in humidity. Here’s the upside: you can hide most of these cracks almost invisibly using medium-viscosity CA (cyanoacrylate) glue mixed with fine sanding dust pulled from the very same piece of ebony. This fills the void, nails the color match, and cures hard enough that you can sand and polish it flush with the surrounding wood. Here’s the full walkthrough.
Why Ebony Cracks So Easily
Ebony gets prized for its near-black color and tight grain, but those same traits make it a cracking liability:
- Low moisture tolerance - ebony barely flexes. Under stress it doesn’t bend, it splits.
- Uneven drying - the outer surface dries faster than the core, and that mismatch builds internal stress.
- Temperature and humidity swings - leave a pen blank, knife scale, or finial near a heat vent, or in a dry shop over a weekend, and you can come back to a fresh hairline the next morning.
- Tight grain density - once a crack starts, it tends to run clean along the grain instead of stopping on its own.
Most hairlines aren’t structural failures. They’re cosmetic. But ignore them long enough and they widen, trap finish unevenly, or telegraph right through a glossy top coat.
Why CA Glue + Sanding Dust Beats Fillers
Commercial wood fillers, tinted epoxy, wax sticks: none of them really nail ebony’s true black, because ebony isn’t actually pure black to begin with. It carries subtle brown, grey, or purplish undertones depending on the species (Gaboon, Macassar, Mun, take your pick). Use dust from the same piece, though, and you get a perfect color and grain match automatically. CA glue brings its own advantages on top of that:
- It cures in seconds, so there’s no standing around between passes.
- It penetrates hairline cracks by capillary action, even ones so thin you can’t fully see them.
- It hardens to a density close to the wood itself, so it sands and buffs like ebony rather than reading as a plastic patch.
Medium viscosity is the sweet spot here, and it matters more than people expect. Thin CA soaks in too fast and can flash-cure before it properly bonds the crack walls. Thick CA just sits on top and never wicks into the hairline at all.
Step-by-Step Repair Process
1. Clean and Open the Crack Slightly
Wipe the area with a dry cloth, or blow it out with compressed air, to clear loose debris. If the crack is really tight, run a fine utility blade or a pin along it very lightly to open it a hair’s width. That gap gives the glue somewhere to actually go.
2. Generate Matching Sanding Dust
Sand a scrap offcut from the same piece of ebony (or an inconspicuous spot) with 220-320 grit paper. Collect the fine dust on a clean sheet of paper. That dust is now your filler pigment.
3. Pack the Crack with Dust
With a toothpick or a small spatula, press the dust gently into the crack so it sits just below the surface. Don’t overpack it. The glue needs room to bond into the gap, not just sit on top of a dry plug of dust.
4. Apply Medium CA Glue
Drip medium CA directly onto the dust-filled crack. You’ll see it wick downward and darken as it soaks into the dust. If the first drop disappears completely, add a second one. Cracks are almost always deeper than they look from the surface.
5. Accelerate and Cure
Hit it with a CA accelerator spray for a fast, even cure, or just let it sit untouched for 2-3 minutes. Don’t move the piece while it’s curing, or you risk trapping air bubbles in the patch.
6. Sand Flush
Once it’s fully cured, sand the patch flush. Start at 320 grit and work up to 600-1000. Done right, the cured CA-and-dust mix blends almost seamlessly into the surrounding ebony.
7. Finish as Normal
Apply whatever finish you normally use, oil, wax, lacquer. Since the color match is exact, the repair tends to vanish completely once a glossy or satin topcoat goes on.
Common Mistakes to Avoid
- Using dust from a different species - even other ebonies can shift slightly in tone, and it’ll show.
- Applying too much glue at once - it pools up and leaves a raised bump that’s a pain to sand flat.
- Skipping the dust and just running straight CA - this leaves a visible clear or amber-tinted line right through the crack.
- Sanding before it’s fully cured - CA glue can feel rock hard on the surface while staying soft underneath. Give it at least 10-15 minutes before any heavy sanding.
When This Method Isn’t Enough
If a crack runs deep, goes all the way through the piece, or moves when you flex it, CA glue and dust won’t stabilize it structurally, period. For those situations, look at:
- Flooding thin CA glue repeatedly to fully penetrate a deep crack, then using the dust-fill method on top of that.
- Epoxy mixed with black mica or dye for larger voids.
- Stabilizing resin for porous or spalted sections that are prone to further cracking down the line.
Conclusion
Medium CA glue paired with matching sanding dust is about as reliable and nearly invisible as ebony crack repair gets. It’s fast, it’s cheap, and because it uses the wood’s own material, the color match is practically guaranteed. That’s why it’s become a go-to fix for woodturners, luthiers, and pen or knife makers who keep working with this famously crack-prone wood anyway.